F I N E H Y D R O C A L C A S T I N G S
B Y C. C. C R O W
P. O. B O X 1 4 2 7
M U K I L T E O, W A 9 8 2 7 5
U S A
Crow's Home
 Home List Top
 Next Clinic
 Crow's How 2
 Previous Clinic
 Order Crow's
 Contact CCC

|
C. C. Crow's On Line Clinics |
|
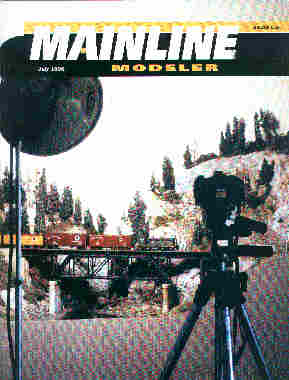
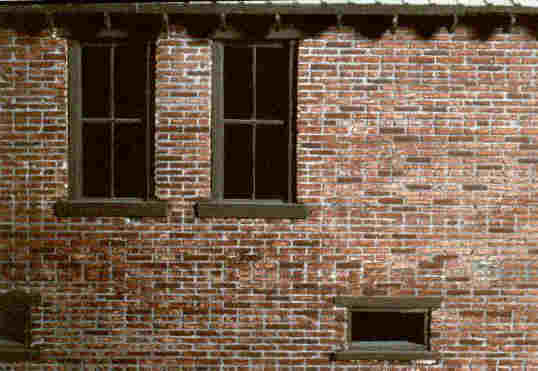
AND OTHER MODELING TIPS - LIGHTS, CAMERA, ACTION!I began my photographing experience when I was about eight years old. I had a hand-me-down Kodak six-20 Brownie Junior box camera. Curiously enough included on my first roll of film in with our King's Park, Virginia home, my sisters and our cat, was a stone arch bridge (I think from Manassas battlefield) and a model I had scratch-built. For high school graduation I received a Canon ftb SLR Camera from my parents. It took lots of pictures before I wore it out. (I didn't know you could do that but I did, lenses too.) I next moved up to Canon's classic A-1, manual focus, auto exposure, which I still use today. What do I need an auto focus for? The A-1 has auto exposure, either aperture priority or speed. You want to close down the aperture (use the largest f-stop possible) to get a greater depth of field. Yeah, that pin hole stuff, though I use the standard apertures that come with the factory lenses. Over the years I have taken thousands of photographs. Most of them are color transparencies. I love a good slide show. I guess that came from my father who took lots of photos of us kids growing up (I'm the youngest of four). We'd gather around in the living room for the latest show. On occasion I have used one of Bob Hundman's medium format cameras. They are a treat. Larger is better! With one of the cameras, you can adjust the planes of the film and lens to focus on planes not perpendicular to the camera. Still, my 35mm does okay and I have purchased a special tilt/shift lens that does the same trick. Ninety percent of my photography is taken with through a Vivitar Series 1 28-105mm zoom lens. I use it for almost all of my outdoor activities including prototype photography. With its wide range I can crop my photos as I take them. It offers very good optics, Marco focusing and f22. Its glass is f2.8 to 3.8, which refers to its maximum opening. You might want more glass if you are taking sports photograph or things moving without much light. But our models don't move and we can mount the camera on a tripod and close the ring down for a long exposure. I can hand hold down to 1/30th/sec, sometimes 1/15th. But that is just for outdoor work that I really don't care about. For the good stuff to keep the camera absolutely steady for long exposures we want to use the tripod. I bought a good one, a Bogen. It is fully and easily adjustable, tall and has a quick release. Instead of being a pain in the neck like some it is a pleasure. I much recommend having such good equipment if you are at all serious. When taking wide shots, say of a scene on a layout, I'll use the zoom lens. For tighter close-up shots, the Vivitar lens works well however I purchased a Canon 50mm f3.5 Macro lens. This comes with an adapter so you can take true 1:1 ratio close-ups. Now blow that up to 8x10 and you have a photograph! Such close examination actually helps your modeling. It quickly points out what you have done right and what you need to do a little more work on. For our close-up shots we need to get a lot of light in. Sure, you can take your models outside however that's not always convenient due to weather and time of day. Instead, I suggest you invest in a floodlight and stand. You'll need at least one with a 500w 3200°K tungsten bulb. I have a Smith Victor that cost about $75 with the stand. They have cheaper and more expensive varieties. This is my primary light source. To soften the shadows I use a simple clip type spotlight with a 250w bulb. This fill light is set back and to the side of the main light. When I first started taking photographs of my white Hydrocal patterns I was often frustrated by the poor results. It seemed as hard as I tried they were hard to see. Finally, I figured it out. These are just tiny little lines scribed into a white panel. Very difficult indeed. The only thing that was there was a shadow and the rest was very light. What worked best was to use sunlight (or a photoflood) at a sharp angle. A fill light would only wash things out. After that taking a photograph of a regular object, like a whole model is pretty simple. You just need the right equipment and good techniques. 

BLACK and WHITEBlack and White film doesn't care what type light you use. It is either light or dark. Color film does but we will talk about that later. For most of my earlier modeling projects I was taking B&W. I used Kodak Tri-X. Now days its T-max which is finer grain. That's important when you are enlarging. The finer the grain the higher the quality. Generally speaking, the slower the film the finer the grain. There is also push-processing, which means you deliberately underexpose the film (because there is not enough light) and then develop it longer. This too causes some loss in quality so you are better off getting lots of light into the scene. That's why it is so hard to get a good picture of a layout. It needs to be properly lighted. DARK ROOMI guess I should admit it, I'm a control freak. Not over people, but things. I have no luck with people so I take it out on things. Like photos. I could take all my photographs in to have them developed and printed but that would both cost and arm and a leg and they wouldn't do what I wanted. For that I have to do it myself. While working with Bob Hundman on my first modeling projects he showed me how to develop and print my own B&W photos. You don't need a dedicated dark room or too much expensive equipment. I do mine down in the basement late at night with some cardboard over the windows, three trays and the only somewhat permanent/expensive object is the enlarger. It is an Omega brand with a color head (lamp house) I paid under $200 for. Not top of the line but not bottom either. It was a very good deal. The color head allows me to do color but that is beyond the scope of this yapping. There's also a timer. The setup takes maybe 15 min. and I am printing. You'll need paper, developer, etc. of course too. 
My dark room set up, late at night. (simulated) You might be scratching your head, saying I could never do this. However, I think that is what I am saying, oh yes you can. It's not that much of an investment, it is easy to do, and you can do it in your basement, spare room or bathroom. The processes are simple. You take the exposed film into a dark closet. Pry open the canister and feed it into a processing drum and close that up into the developing tank. Now you can go back out into the light and develop the film. Depending upon what kind you pour the developer into the tank for a certain amount of time, 8-10 min. or so. Every 20 sec. you roll the tank to refresh the developer. You pour the developer out and pour stop solution in next, just for a minute. Pour it out and pour the hardener or fix bath in last. That takes about five minutes, again, rolling it ever 30 sec. or so. Finally, we rinse the film off (you can use a special bath formula) in tap water. Then we hang the processed film to dry and you get your first look at the negatives. Oh, they look good to me! Once the film is dry we can print them. The process is much the same. The negative is placed in the enlarger and we adjust it for the size we want, full frame, close-up or whatever (remember, we could try and tell them what we want at the photo shop or we can do what we want, exactly what we want, ourselves here in the darkroom!). Focus it and then get out the paper. I used to use graded paper exclusively. that is paper that the contrast has been adjusted at the factory. Generally I used 3, 4 or 5, the highest contrast paper- remember, I was struggling to pull the details out of nowhere. Now days graded paper has given way to multigrade paper that uses color filters to adjust the contrast. I resisted this but was finally forced into using it when graded paper became hard to come by and much more expensive. At first I couldn't get it to work, everything always seemed cloudy and then I realized they really meant it when that said you shouldn't expose it to you safelight- you need a special safelight or to do it in total darkness. Ah, that was the key. It works just as good as the old graded paper. Of course there are darkroom tricks to learn like simple exposure times, burning and dodging, types of papers, developing times. I wouldn't go into those. Kodak and others have lots of literature on that. Again, I just want to say the any model railroader can probably do this. It's easy, it's fun, and you can enhance your modeling experience with it. There are prototype photos and countless details to examine. And of course there are photos to take of your favorite models. SHOOTING YOUR MODELOkay, so let's talk about setting up to take a photo of your favorite model. First, think about how you want your photograph to look. Is it going to be a three-quarter view (probably the best choice), a front or rear view? Is it going to be the model alone or are you going to add a background? How about a foreground? This will help you figure out what you'll need and how to set up the camera and lights. For a three-quarter view of the model alone we want some sort of neutral background. We want the object (the model) to take center stage. Doesn't it drive you crazy when someone shows you a photo of something and you have search the thing to figure out what it is (there's a train in there somewhere!)? No, we want to see the model clearly and not be distracted by other things around it. I have a bunch of 24" x 32" color art paper which I use for my backgrounds. Generally, we want a neutral mid-tone as opposed to bright or dark or contrast. You also want a matte rather than a gloss, though you can use those for certain dramatic effect but don't over do it. We want to place our model directly in front of our camera where it is most comfortable to look through the lens, set it up and place the lights. It's best to have plenty of room and a cleared space. I have brought my camera, tripod and light into my workbench on more than one occasion- it's not the most comfortable situation. It's only slightly less comfortable than bringing my work over to the camera set up elsewhere. Oh what I do to take good photos as I go for a construction article! But more simply, if we are just taking photos of a model we can set it up most comfortably. I have a spot that is hip high (42") with access all the way around it. It is 36" x 36". Ideal for what we are doing. One the backside I place an easel (actually, it's a contraption I jerry rigged) that will hold the backdrop. I cover the foreground with art paper too. We want the camera lens to fall completely within this neutral color frame. We don't want to see any folds, shadows or other distractions if we can avoid them. Once we are happy with that we can bring our model in. You can play around with this as it is subjective but think about how high or low a shot looks like of your model. We model railroaders ten to take high shots rather than getting down to scale eye level, that is the perspective of the model we would see if we were a scale person. I like to move the camera around a lot and take lots of photos so I will have lots of choices later on. I move it up and down, from side to side, trying to find just the right spot that shows the model best. The classic shot is a three-quarter view, nose to tail, slightly elevated. Lighting is very important. Your key light should be to the camera's left or right side, and elevated. Look through the camera and note the shadows, reflections and glares. Move the light around and figure out what's best. So things are glaringly wrong, some are subtly right. Now bring that fill light in to soften those shadows. Oh, be careful about exposing your models to the bright lights for too long. The lights put out a lot of heat and you don't want to see you plastic model droop before your eyes! It's happened. Yes, there is a certain amount of artistry, isn't there? I just search for what looks right, then snap the picture. Again, my camera sets itself automatically. I tell it either what speed or aperture and it figures out the combination. There's also a technique called bracketing where you not only take the indicated exposure but one lighter and one darker, thereby assuring that at least one will be just right. I think that is the only difference between amateur photographers and professionals, the pros just take lots of pictures- one of them has to come out! Once you have taken a bunch these type photos you'll sort of figure out if you like lighter, darker or as indicated exposures and you can concentrate on those. My camera has an adjustment for this. For instance, I like my outdoor shots to be a little under-exposed, or darker, rather than the opposite. Now, I wish I could remember which way to turn that stupid little knob! 

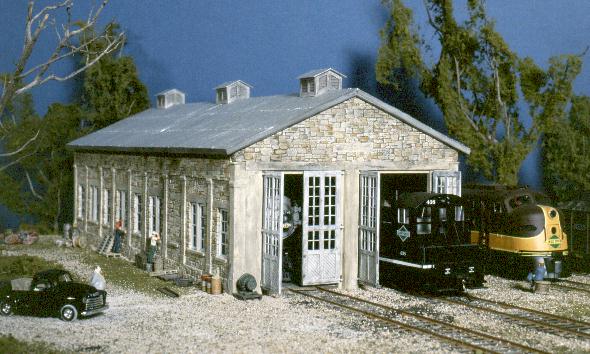
Adding more details, a foreground and background might add more interest to out model photo. How about a few trees, some dirt (sand, its cleaner), ground cover and a couple of figures sitting on a bench. Very quickly we take our model from being just a picture of a model to a picture of a real scene we are attempting to depict. It becomes much more exciting. We still want to have the model take center stage but we can fill in the background with its proper setting. As we move the camera around looking for that perfect shot we can move the background elements around too, to get it just right. Be careful of those shadows on the backdrop though. 


COLOR PHOTOGRAPHYYou might think that indoor color photography is beyond your reach. Actually, if you can do it in B&W as I have described above it is real simple to do the same (less developing and printing) in color. It's called Tungsten balanced film and it is very easy to use. The first time I did it I couldn't believe the results. You mean I did this? Wow, that was easy. The film is the key. Both Kodak and Fuji manufacture 64 and 160 speed Ektachrome color transparency (slide) film that is balanced with the 3200°K photoflood lights we have been using with the B&W. It is as simple as that. You can get filters to adjust regular daylight film to these lights and you can also get (blue) photoflood bulbs that mimic sunlight but I've found them to be less effective. Tungsten 64 is the way to go. Most of the model photographs on this web site were taken that way. Temperature is a big factor when developing color film. It must be just right so developing is best left to the experts. I've found a local shop that does a good job in only one hour, about the time it takes to eat at my favorite Chinese place! It's cheap too. The food and the processing. I should mention digital photography. It's getting there. Still, even with best equipment, at least with what I can afford, there is still a quality gap as well as archival problems. The high resolution I desire, and easily obtain with my color transparencies, is expensive and slow in digital. I plan to keep taking photos as I have explained for the time being. The logical choice for me is to get a good 35mm film scanner. Actually, everything on this site was scanned with a $200 Pacific Image 1800 ppi scanner that I borrowed from a friend. I'm debating if that's all I need or how much higher I should go. There is more on digital imaging in my web nest page. 

In closing, let me again state that good model photography is within your grasp. Yes, it takes some special equipment but not really that special. You probably already have some of it on hand. You can start off small and work your way up like I did. It is a very pleasurable aspect of the hobby. My photographs are much better than they appear here. I know my web site has a ways to go. I'll be working on it. Right now I am only guessing at the format options and required resolutions. Once I figure this stuff out I am sure it will improve! Not bad for an amateur. DIGITAL PHOTOGRAPHY!Hey, get with it Pops, let's join the modern age. Digital photography is wonderful stuff and getting better and cheaper every day. With the click of a few buttons my digital camera can capture an image and I can post it on the web site, e-mail it a customer or loved one, or print it out- all in an instant. Perhaps rendering all of the above to anchient history. It's still worth understanding. And mixing together. I purchased a Nikon 35mm slide scanner which converts the transparencies into 34 mega pixel digital imagess. I'll still argue that a color slide projected on a screen late at night is still superior to one on a computer screen. And macro photography is best done, at least for me, the old fashion way. On the otherhand give me a few minutes with Photoshop and those darn power lines across the golden sunset are gone.
|