F I N E H Y D R O C A L C A S T I N G S
B Y C. C. C R O W
P. O. B O X 1 4 2 7
M U K I L T E O, W A 9 8 2 7 5
U S A
Crow's Home
 Home List Top
Next Clinic
Crow's How 2
Previous Clinic
Order Crow's
Contact CCC
Home List Top
Next Clinic
Crow's How 2
Previous Clinic
Order Crow's
Contact CCC
|
C. C. Crow's On Line Clinics |
|
AND OTHER MODELING TIPS - CASTING HYDROCALI shouldn't tell you this. Casting Hydrocal, that is production casting, is sort of like washing dishes. Actually, it is a lot like it. Boring as hell and they just keep coming. Any idiot can do it. The main trick is to keep the bubbles out. To do this we need to reduce the surface tension. Sort of like static friction air bubbles like to cling to the rubber molds. Just like a wetting solution used for scenic ground covering we can simply use a few drops of liquid detergent in a jug of water. Let me explain the process.
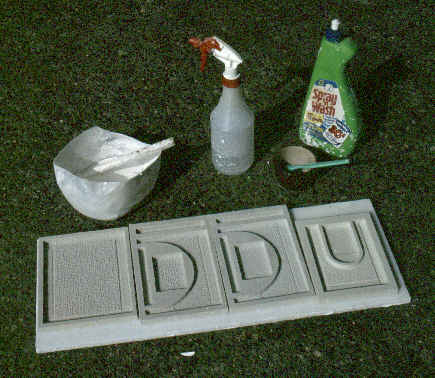
PREPARING THE MOLDSOkay, we've just pulled some castings out of our molds. They are somewhat self-cleaning however there will probably be a few chips and flash left over. I wash my molds of in a sink that has a trap so I do not have to worry about the plaster clogging my drains. You want to be very careful about this unless you happen to know a cheap plumber. I do not. Once they are clean I prepare the molds for casting by wetting them down with a 50/50 mix of Spray-n-Wash laundry detergent. I only apply a little, about a toothbrush full. I gently (quickly) scrub the brush around touching all surfaces and especially every corner that likes to trap air bubbles. At this point the detergent is still a little too strong. It will create its own froth so we want to dilute it down. I use a spray mist of straight tap water. We don't want to wash all of the detergent away but just enough so the mold is evenly "wetted". The excess water is shook off and we are ready to go. I usually pour two or three boards at a time. The boards are 9" x 24", more or less, half-inch thick plastic cutting boards. You don't want to use wood as over time it will warp on you. This is a very wet process. There is plaster, wet plaster, everywhere. And water. Plastic boards don't care. I lay out the molds I am doing on the boards in an orderly manner. MIXING THE HYDROCALWith them prepared we next turn our attention to mixing the Hydrocal. The book says you should add the plaster to the water, at a ratio of 100 pounds to 45 water. I always do it the other way around. Not ratio-wise, but I add the water to the plaster. (I should explain that I am using the generic term "plaster" to mean White Hydrocal.) I've just always done this. And I don't bother with weights. Experience has taught me to estimate the correct amounts. I mix my plaster in cheap plastic pails, actually, the bottom of Wesson oil containers. I usually do about three or four pounds of plaster depending upon the size and number of molds I am doing. I use fresh Hydrocal. If you have some with lumps in it you're better off throwing it out. Over time it absorbs moisture out of the air and begins to set- it would be strong or consistent. It's only twenty-two bucks for 100 pounds- so throw it out and start over. Next we add the water. The trick is to add all the water we need before we begin stirring. If you start too soon you'll get some hard lumps that are very difficult to loosen up. You don't want that. Instead wait, then start stirring. I use, on, about a 1/2" square wooden stick. I keep it clean of old plaster as it may chip off and contaminate the mix. The same is true with the mixing pail, we want to clean it out each time. At any rate, rapidly stir the mixture. Work it until you have a smooth consistent mix. We are after a nice thick soupy mix. Not too thick and not too thin. After a while you'll determine the mixture you desire. As a rule of thumb, my mixture level is slightly above the dry powder level, by maybe 10%. Since I am in production, I cheat a little and use a Braun electric hand blender. It gives a nice consistent mix. Let's fight those bubbles a little bit more before we pour. I vigorously tap the bottom of the pail with my stirring stick which helps bring the bubbles to the top where they can be skimmed off. POURING THE HYDROCALOkay, now we are ready to pour! I use my stirring stick to guide the pouring plaster into the molds. Otherwise it would tend to splash everywhere. We are in a bit of a hurry as you only have a certain amount of working time. You can use cold water to delay its setting or hot water to speed it up. If you want a really long working time add a little vinegar. With the plaster all poured now we want to shake the bubbles out and level off our castings. I try and pour in just the right amount so the molds are just slightly over filled. I use a small but weighty metal bar to vigorously tap the bottom of the boards and vibrate the bubbles up. I've thought about building a vibrating table however this method serves its purpose. Besides, it leaves everyone in the house know I'm pouring- and not napping like I think they might suspect. I know, you think we are done, just wait a while and we can pull out our new castings. There's one last thing. I like to have nice smooth backs on all my castings. So just as the plaster begins to set up I quickly scrape the excess plaster off with a metal straight-edge, actually, an aluminum triangle. And that does it. In about 15-20 minutes they are set enough to remove and start the process over. I am always thrilled to pull the first castings out of a new mold. After
all, it represents what may have took several days to create. Now I can
recreate them in just moments. You'll probably want to check out my postings on the Durango Roundhouse model. I've loaded a bunch of pictures showing many of these processes. For more illustrations see: DURANGO RH CONSTRUCTION

|